Apps & Utilities
31 files
-
Fuzzy Rename
By Circo
FuzzyRename - If you've got a bunch of .png or .avi files that are similarly, but not quite exactly named to your ROM/zip file names, such as:
Desert Falcon (1987) (Atari) (PAL).png
Desert Falcon (1987) (Atari) (PAL) [!].a26
Released August 11th 2008
and you'd like to get the names to match so you can use them in an emulator, then this program is for you!
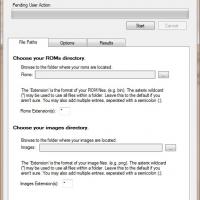
1) browse to the folder with the files you want to rename. (typically your .png or .avi files)
2) browse to the folder with the files you'd like to match (typically rom files or .zip files)
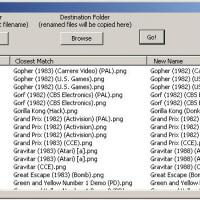
3) the program will chew on these 2 folders for awhile (yes, it is a slow process, sorry) and then display a list: the rom name, the closest .png file it could find, and then the target filename. You will likely have to expand the list out to see all the details.
4) browse to the folder where you want the renamed files to be placed. - the source .png files are never actually changed-the files are copied and renamed to the destination folder.
5) press Go! to do the entire list, or:
5a) select individual files to work on. If you highlight a file(s) you can right click it and copy+rename an individual file, delete the selection, or change the target filename by hand.
5b) pressing the delete key when files are selected will delete them from the list
5c) 2x clicking the a filename will pop up the target filename editor
The tool is by no means perfect when finding target filenames. You should probably scan the list by hand to make sure it's not doing something really weird with your files. It only checks filenames against others with the same starting letter, so it should not try to match "asteroids" with "blasteroids"
If you see a blank in the "closest match" field, then it didn't find anything close enough to rename the file to. There's nothing you can do here, since you cannot manually edit the source filename, only the destination. Sorry 'bout that, maybe in the next release.
1,190 downloads
(1 review)0 comments
Updated
-
FatMatch - File Renamer
By EmuMovies
FatMatch is a renaming utility created by FatOne85. Fatmatch uses fuzzy logic to rename artwork and video files to match your rom set.
Some benefits over other similar software are:
- Immediate Progress Report on Fuzzy Matching
- Folder selection as opposed to list copy-pasting
- Treeview of results for easier match picking
- Software-controlled file renaming
8,331 downloads
-
Soft-15kHz
By Circo
1. About
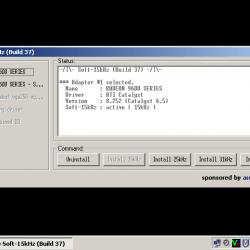
The project “Soft-15kHz” is about reprogramming of videoadapters and/or their drivers to make them usable with normal Arcade monitors and/or TVs (via SCART RGB <Details>).
It does this by doing small changes to the windows registry to add typical arcade screen resolutions, as well as tweaking some existing ones, and locking out all others.
2. Status
The project is to be considered ALPHA Status but should work as intended.
* Features
o Frontend for Windows 98*, 2000 and XP
o 15kHz Resolutions.
o 25kHz Resolutions.
o 31kHz Resolutions.
o ATI Catalyst supported.
o NVidia ForceWare supported.
o Matrox Drivers supported.
o 3Dfx Drivers supported.
o Intel GMA Drivers supported. (experimental)
o Intel EGD Drivers supported. (experimental)
* only ATI on Windows 98.
* Planned Features
o 35-38kHz Resolutions.
o Other Drivers supported.
3. Costs and Donations
The use of the project is totaly free, however developing is not, as it sometimes requires to buy certain stuff, most likely new or special video cards.
So if you like the program feel free to donate some money.
4. Screenshots and Downloads
For Screenshots and Downloads please look at this Thread.
5. Resolutions in Detail
Here is a list of resolutions currently used.
* 15kHz
o 240 x 240 @ 60Hz
o 256 x 240 @ 60Hz
o 256 x 256 @ 60Hz
o 256 x 264 @ 60Hz
o 304 x 240 @ 60Hz
o 320 x 240 @ 60Hz *
o 320 x 256 @ 60Hz *
o 336 x 240 @ 60Hz
o 352 x 256 @ 60Hz
o 352 x 264 @ 60Hz
o 352 x 288 @ 50Hz **
o 368 x 240 @ 60Hz
o 384 x 288 @ 50Hz **
o 392 x 240 @ 60Hz
o 400 x 256 @ 53Hz * **
o 448 x 240 @ 60Hz
o 512 x 240 @ 60Hz
o 512 x 288 @ 50Hz **
o 632 x 264 @ 56Hz **
o 640 x 240 @ 60Hz
o 640 x 288 @ 50Hz **
o 640 x 240 @ 60Hz
o 512 x 448 @ 60Hz Interlace
o 512 x 512 @ 60Hz Interlace
o 640 x 480 @ 60Hz Interlace
o 720 x 480 @ 60Hz Interlace
o 800 x 600 @ 50Hz Interlace **
o 1024 x 768 @ 50Hz Interlace **
* On ATI uses "Fake"-Resolutions with 1 Pixel increased size to avoid DirectX-Problems.
** Says 60Hz in Windows.
* 25kHz
o 496 x 384 @ 60Hz
o 512 x 384 @ 60Hz
* 31kHz
o 512 x 448 @ 60Hz
o 512 x 512 @ 60Hz
o 640 x 480 @ 60Hz
o 720 x 480 @ 60Hz
o 800 x 600 @ 50Hz **
o 1024 x 768 @ 50Hz **
** Says 60Hz in Windows.
6. Supported Drivers und Adapters
It should work with any NVidia ForceWare (66.93 and up), ATI Catalyst (2.5 and up), Matrox PowerDesk and 3Dfx Voodoo3/4/5 Driver, which themselfs support a large number of modern video adapters.
Attention! The Windows default drivers are NOT compatible.
Note: The NVidia GeForce 8-, 9- and GTX series require an EDID-Dongle for resolutions below 512x384.
For a selection of tested drivers and adapters please look at this Thread.
7. Frequently Asked Questions
For a list of frequently asked questions please look at this Thread.
8. Additional Informations
* Basic Formulas to calculate resolutions. (In German)
* Information on Windows and the Drivers. (In German)
664 downloads
(0 reviews)0 comments
Updated
-
SnapShot Magician
By Tempest
Thanks to Tempest for creating this program and sharing it with us.
SnapShot Magician can be used to create videos, and screen shots for any emulator. SnapShot Magician also can create reports so that you can easily see which images are missing for your roms.
Before you can use Snapshot Magician with Fraps, you will need to set the 'Folder to save movies in' to Snapshot Magician\Videos Temp, and the 'Folder to save snapshots in' to Snapshot Magician\Snap Temp.
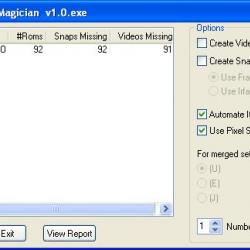
When you run ScreenShot Magician, you will see something like this:
It is very easy to see the number of roms, videos, and screen shots that you have for your emulator.
If you want a detailed on screen report, click 'View Report'. A second window will appear:
You can then click on 'Save Report' to save the report that you are viewing. All reports are saved to the ScreenShot Magician\Reports folder.
A brief description of options available in ScreenShot Magician:
1. Put a tick in the box if you want to 'Create Videos'
2. Put a tick in the box if you want to 'Create Snaphots' (You can do both videos, and snapshots, at the same time)
If you put a tick in the box to 'Create Snaphots', the next two options are available:
3. 'Use Fraps' or 'Use Irfanview' You can use either program to create snapshots, but not all emulators are compatible with Fraps.
4. Put a tick in the box to 'AutoMate It!' If you select this option, ScreenShot Magician will automatically create Video / Snapshot, waiting the same amount of time (Start Delay) that you waited to take the first Video / Snapshot.
5. Put a tick in the box to 'Use Pixel Search'. If you enable this option, ScreenShot Magician will wait first for the Start Delay, and then for the area under the mouse pointer to change color, before taking the SnapShot, Video. The mouse pointer location is set when you first press the 'Start Key', so wherever the mouse is when you start the 'AutoMate It!' process is the area that is monitored
6. If your emulator is setup to use merged sets, then the next three options will become available. You can decide which region will be used for the Video / Snapshot.
7. Use the up / down arrows to Select the 'Number of Windows' that an emulator will open before taking a Video / Snapshot. This is used for emulators like Future Pinball that load multiple windows before the table is shown.
Click 'OK' to start the emulator, and press the 'Start Key' ({Print Screen} by default)To start the process.
Snaps will be saved in ScreenShot Magician\Snaps, and Videos will be saved in ScreenShot Magician\Videos
You will have to move them to the appropriate folders, after verifying the contents. This should be done after every session with ScreenShot Magician.
You can use custom scripts with SnapShot Magician. In this download, you will find a folder named 'Includes'. In that folder I have a script that I used named 'VpinMame.ahk' that I used to close the window that asks if I have the right to play the game, and some windows that asked for game settings. You can view this file as an example of what might be done to help automate the snaps process.
You can write your own scripts, that will automatically be run after the game is run, but before the snap/video is taken. The script must be in the SnapShot Magician folder, and must be named 'SpecialOptions.ahk'. I have included such a file to show the usage. You can (and will want to) delete the SpecialOptions.ahk file that I provided, it does not need to be used, but can be used to provide more flexibility.
If you want to use one of the files in the 'Includes' folder, Copy it to the SnapShot Magician directory, and rename it to SpecialOptions.ahk.
You may also be able to use AutoScriptWriter to create scripts for use in SnapShot Magician.
Options available in ScreenShot.ini:
[General]
StartKey=PrintScreen
SkipKey=S
RetryKey=R
VideoKey={F9}
SnapKey={F10}
RecordTime=5000
Debug=0
[Emulator]
TITLETEXT=
SnapsFolder=
VideoFolder=
WorkingPath=
Command=
ROMPath=
RomFilter=
RomsInFolders=
GamesIn7Zips=
AlsoLaunch=
SendKeys=
WaitBeforeKey=
LaunchBefore=
LaunchAfter=
ExcludedFiles=
StartKey - the key to press to take a snap/start a video
SkipKey - If a game crashes in an emulator, Pressing 'S' (Skip) will add the game to the excluded files list for that emulator in your ScreenShot.ini. Also, the emulator is exited cleanly, and SnapShot Magician will continue with the next game.
Make sure that the VideoKey, and SnapKey match the 'capture hot keys' in Fraps
RetryKey - Restart the Emulator with the same Game
RecordTime - Length of time to record a video in milliseconds. (1000 milliseconds = 1 second)
Debug - Set to 1 to get information if you are having an issue.
TITLETEXT - System Name
SnapsFolder - Folder that the existing snapshots for your emulator are in.
VideoFolder - Folder that the existing videos for your emulator are in.
WorkingPath - Folder that your Emulator.exe is in.
Command - Command line to run a game in the emulator.
Use these variables in your command:
[Rom] Name if rom without extension
[RomFile] Name of rom with extension
[RomPath] Path to roms
RomPath - A single path to where the roms are located
RomFilter - list of valid rom extensions separated by commas IE: abd,def,ghi
RomsInFolders - Set to True if your roms are contained in sub folders
GamesIn7Zips - Set to True if your roms are in .7z format
AlsoLaunch - Full path and filename to a file to launch synchronously with the emulator.
SendKeys - Keys to send to emulator (helps with automation)
WaitBeforeKey - Time to wait before sending keys
LaunchBefore - Run this command before the game (Usually to mount an image)
LaunchAfter - Run this command after the game exits (Unmount an image)
ExcludedFiles - list of files to skip separated by commas IE: Game1,Game2 (Usually added by pressing 'S' in ScreenShot Magician)
I included some sample ini files as an example of how to set up an emulator. When you run SnapShot Magician for the first time, an screenshot.ini file will be created for you.
One final note: the terms Snapshot Magician, and ScreenShot Magician are synonymous.
Download Fraps
Download Irfanview
401 downloads
(3 reviews)0 comments
Updated
-
JR Directory Printer Utility
By Circo
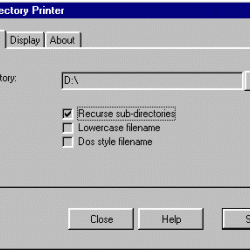
The JR Directory Printer Utility allows you to print a listing of every file contained within a directory and/or subdirectory(ies). The result displayed in NotePad or default text editor as "dirprint.txt" file. This file is created in "JR Directory Printer" installtion folder, each time you click "Start" button.
Options:
Check Recurse Sub-directories option to see a complete list of all subdirectories and all files in all directories.
The Lowercase Filename option will force all file names into lowercase regardless of the actual file name.
Dos style filename option will limit the file name length within 8 chars.
Display Sub-directories will result in a list of all subdirectories contained under the selected directory along with a list of all individual files contained under the root directory. It will not list all subdirectories or individual files contained in the main subdirectories. To see a complete list of all subdirectories and all files in all directories, you would check the Recurse Sub-directories option and click on the Start button. This would rewrite the"dirprint.txt" file using the new options.
You can limit length file names so that they fits properly in list. By default this value is 35 chars.
You can check/uncheck Display Size, DateTime and Attributes option to list/unlist the file size, modified date/time and file attributes (a - Archives, r - Read Only, s - System, h - Hidden).
112 downloads
(0 reviews)0 comments
Updated
-
AppPath
By Nologic
A better description & information coming in the near future.
------------------------------------
Normal usage for App Path executables is ether via the Run Dialog (WIN+R), CMD Console or Batch Scripts, and you can apply normal augments.
Example Run Dialog:
iPacUtil /H
Example CMD Dialog:
start iPacUtil /H
In ether case should iPacUtil be registered within App Path the above would bring up the Console Help Text.
Lets give a more interesting example...lets say we have Kega Fusion installed to:
C:\Emulators\Kega Fusion\Fusion.exe
And we have our roms at the following location:
Z:\No-Intro\Sega - Mega Drive - Genesis\
We register Fusion with App Paths then open a CMD console in the Roms folder so that our command prompt looks like so:
Z:\No-Intro\Sega - Mega Drive - Genesis>_
Now at the command prompt enter:
start fusion
Hit the ENTER key & then close Kega Fusion.
Now at the command prompt hit the UPARROW then SPACE now type the first letter of a game you wish to play...then hit TAB till that game is showing in the command prompt...example:
start fusion "Crue Ball - Heavy Metal Pinball (USA, Europe).zip"
Then hit ENTER and the game will start
------------------------------------
Okay download and extract anywhere...probably best to extract to ".\Program Files\AppPath\." just so its something easy to find. next double click on each executable...this should first off create a new folder in your SendTo RightClick context menu called AppPath inside of it should be shortcuts to each executable as you have executed them.
Next transverse your file system to where "iPacUtil.exe" is and RightClick on it and select from the context menu "SendTo\AppPath\AppPath Add" at that point you'll have just added iPacUtil.exe to App Path.
To remove well use the other SendTo shortcut.
Keep in mind that any executable that you add to App Path...should there be any white space in the name...it will be removed. For example "Foo Bar.exe" will become "FooBar.exe" this is to allow for proper execution via the Run Dialog or the CMD Console.
If a file by the same name already exists you'll receive a error dialog informing you so...nothing gets overwritten. You may still remove the current value...and then add...but by default it will not overwrite a preexisting value.
42 downloads
(1 review)0 comments
Updated



(Rev1).thumb.jpg.d2bbf4a027a795da3e02d1337646c94e.jpg)
(v1.02)(Aftermarket)(Unl).thumb.jpg.aa943a0a0f3f64cdda2fbee7f57ebdac.jpg)

(EnFrEs)(Rev1).thumb.png.45aff6333d7f95fcb15dc3a396afa9c4.png)
(EnFrEsPt).thumb.png.f7d2b68c0d0b0b4e84ca1d7c7115eb82.png)

.thumb.png.cfa80216d5119246f563d989598c1894.png)

