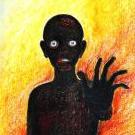
fukc Posted May 10, 2018 Share Posted May 10, 2018 so, my comment on this post started a project for myself i was not counting on. i thought i was going to be manually creating 3D boxes for just a few hard-to-find / ugly-art-having games in my library. for example, the best 3D box a quick search for Earthbound Uncut on SNES got me. unusable. turns out the "official" snes boxes at the angle I prefer are all a bit borked. compared to an actual snes game box it looks unnatural. check out the front-left box edge in the attached zoomed in earthbound box with just a white bg applied behind the standard pngs i've been downloading. just began, so I'll be tweaking the template a bit, and making it available on here at some point soon. here's some boxes i made from the rough draft template for games i couldn't find images for. the v1 template just adds perspective to box front images. not great, but better than nothing. cheers! 2 Link to comment Share on other sites More sharing options...
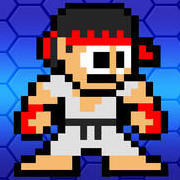
Kondorito Posted May 10, 2018 Share Posted May 10, 2018 Hey @fukc With @SupraKarma we made a complete SNES "real" 3d box pack over at the HS forums. Each game with its corresponding spine, and all made from original scans. Example: There is another cleaner version set over there, but it has a default spine for every game. Nevertheless, these are two sets that you might want to check out for your project. Take care! 2 1 Link to comment Share on other sites More sharing options...
wallmachine Posted May 10, 2018 Share Posted May 10, 2018 @Kondorito did yours and @SupraKarma set come in 2D? Link to comment Share on other sites More sharing options...
Kondorito Posted May 10, 2018 Share Posted May 10, 2018 I believe we have the psds formatted with the covers and spines that we bulk actioned. I dont have them here though (currently out of town). 1 Link to comment Share on other sites More sharing options...
fukc Posted May 11, 2018 Author Share Posted May 11, 2018 11 hours ago, Kondorito said: I believe we have the psds formatted with the covers and spines that we bulk actioned. I dont have them here though (currently out of town). @Kondorito dig it! i'd really like to see the psds you set up when you get back. how automated do you have things? still working out how to auto with slight variations in box-front img dimensions and batching.. really liking this look though. perhaps my time will be spent "faking" a few overlays to match this instead :) i'm new here. are there official psds in place already i haven't found yet? or everyone is kinda wild [wild] west here with it? PS. i just reread that yours is all from og scans, so my initial worries of repetitive scratches have turned to nothing but excitement to see your set. thanks again! Link to comment Share on other sites More sharing options...
Kondorito Posted May 12, 2018 Share Posted May 12, 2018 In regards of the psds, its wild west hehe. We made a 2 step action with Supra: first bulked action was to trim the 2d covers, side and bottom spines, and move them as different layers to a fixed place in each games psd. Second action was to grab all those psds and made the boxes in png. There were games that had no scans so we had to either grab high res photos from ebay, or make them from scratch (I still remember making Fifa 98 PAL from zero). It was a long project, but Supra is awesome and a hard worker, so we finished the set after some weeks of work. 2 Link to comment Share on other sites More sharing options...
SupraKarma Posted May 14, 2018 Share Posted May 14, 2018 @wallmachine if you have Launchbox installed you should let it download media for 2D boxes - the 2D artwork they are using is UHD for most of the games. There is some inauthenticity involved - I noticed some of the fonts are wrong, and for far too many of the games, he/she/they used that crappy Super Nintendo logo that's floating around the net with way too blocky contours on the outside, but the actual artwork is top notch. If you don't want to have Launchbox install any media, you can download my 'Ultimate SNES v2' pack, it has most of the current LaunchBox assets. 1 Link to comment Share on other sites More sharing options...
fukc Posted May 14, 2018 Author Share Posted May 14, 2018 @SupraKarma do you happen to have the psds handy while @Kondorito is away? i think i know the crappy / somewhat popular logo you mentioned. hoping to create a user friendly psd with a tutorial to help us all avoid things like that further spreading their ugly selves. Link to comment Share on other sites More sharing options...
SupraKarma Posted May 14, 2018 Share Posted May 14, 2018 I'll have to look into that and get back with you... I had planned on uploading the source art as png files, but got sidetracked/lost interest. It's all there somewhere. 1 1 Link to comment Share on other sites More sharing options...
fukc Posted May 17, 2018 Author Share Posted May 17, 2018 thanks @SupraKarma lemme know. just realizing i'm going to have to get cart psds together at some point too. Link to comment Share on other sites More sharing options...
SupraKarma Posted May 18, 2018 Share Posted May 18, 2018 http://hyperspin-fe.com/files/file/15636-super-nintendo-real-3d-box-set/ 1 Link to comment Share on other sites More sharing options...
fukc Posted May 22, 2018 Author Share Posted May 22, 2018 thanks @SupraKarma. i had to make a hyperspin account to get your files.. maybe signing up there will help in my efforts too. ok, long download... these are beautiful, but still all pngs. any luck finding the psd for these? i'm excited to help carry the torch on your project if you'll have me. Link to comment Share on other sites More sharing options...
SupraKarma Posted May 22, 2018 Share Posted May 22, 2018 They were stored as png to save space - it would have been several gb if I remember correctly to store them as .psd. But I'm curious.... why do you need PSD? The image quality wasn't lost by storing them as png. Link to comment Share on other sites More sharing options...
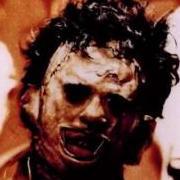
fukc Posted May 22, 2018 Author Share Posted May 22, 2018 makes sense. if you don't mind, and have the psd handy: i don't necessarily need all the layers included. wanted to use your psd...A. for additional snes games. (the homebrew/proto images are nice, but I'd prefer creating custom box art for those) and B. as reference for additional platforms.. though obviously i don't have access to a million physical game boxes/scans. seems you guys ended up with great results. id love to start with something that works for batch exporting. i strongly dislike the current GBC 3D boxes I have. terrible lighting effect: PS I've since tested out a slightly-dated version of "imandix cover pro". seems promising, but lacking in a few options i'm willing to stick with PS for. Link to comment Share on other sites More sharing options...
SupraKarma Posted May 22, 2018 Share Posted May 22, 2018 See the thing is, we had a single overlay file with all of the effects merged into a single layer (IIRC). The png files you see - they did have 3 layers, but it was only 'face,' 'side,' and 'bottom.' There was nothing special going on there. I wrote an action that would skew the 3 layers appropriately, then copy the overlay file overtop of the skewed layers. Link to comment Share on other sites More sharing options...
SupraKarma Posted May 22, 2018 Share Posted May 22, 2018 If you want that overlay file I might be able to track it down. I can give you the 'action' file also (you just drag and drop it into an open photoshop window without any projects open). Link to comment Share on other sites More sharing options...
fukc Posted May 22, 2018 Author Share Posted May 22, 2018 gotcha. that's what i figured you'd end up doing since you had actual cut-open boxes to start with.. (edges weren't identical i'm sure). yes please! sizing should match your pngs i just downloaded from you.. all i would need is the action, yeah? Link to comment Share on other sites More sharing options...
SupraKarma Posted May 22, 2018 Share Posted May 22, 2018 Alright, so: Step 1: Open photoshop (with no images, just blank with nothing loaded) Step 2: Drag and drop SNES v4.atn into the open photoshop window Step 3: Open New_Template_V2 Step 4: Open Example file Step 5: Run 'SNES Batch v2' action from the 'SNES group' Done, file is saved and closed. Key notes: Layers have to be the same size, placement, and named exactly the same (e.g. '1,' for the face, '2' for the side, and '3' for the bottom). We had planned on doing something with the bottom, but it never happened because there were too many missings and source artwork is hard to find. The 'action' still looks for it though, so if you make your own stuff, just make a '3' layer and fill it with black or something. SNES_3d_boxes.zip 1 1 Link to comment Share on other sites More sharing options...
fukc Posted May 22, 2018 Author Share Posted May 22, 2018 thanks for this! wait, so in addition to your cleanup work... have you guys been manually slicing out the 3 images each time then? Link to comment Share on other sites More sharing options...
SupraKarma Posted May 22, 2018 Share Posted May 22, 2018 Honestly slicing out the 3 layers is all we did. I don't think I cleaned up a single image, even a few that probably needed it (like Ys III). :) The scans were good quality for the most part. The only cleaning I did was the Europe games - we had to use actual photos (typically ebay). Link to comment Share on other sites More sharing options...
SupraKarma Posted May 22, 2018 Share Posted May 22, 2018 Part of the gimmick with this set was that they were 'authentic.' The colors weren't retouched, dust specs weren't removed, etc. - we wanted to retain the worn, grainy look of the actual scans. Link to comment Share on other sites More sharing options...
fukc Posted May 22, 2018 Author Share Posted May 22, 2018 nm i see Link to comment Share on other sites More sharing options...
fukc Posted May 22, 2018 Author Share Posted May 22, 2018 5 minutes ago, SupraKarma said: Part of the gimmick with this set was that they were 'authentic.' The colors weren't retouched, dust specs weren't removed, etc. - we wanted to retain the worn, grainy look of the actual scans. absolutely! with 'cleanup' i mostly meant how the edges of the 3 images fit together. i see how you got this all to work now. always super interesting to see other techniques in practice. would have never crossed my mind to attempt this sans masking. totally adds to the charm. i'd have over complicated that with worse results. Link to comment Share on other sites More sharing options...
fukc Posted May 22, 2018 Author Share Posted May 22, 2018 and just fyi.. you guys did improve the 'real' box with your 'top left curve' layer. by actually folding the box back up, you'd end up with that visible 'inside/white' edge, well not visible with the perspective you used. hope that made sense. see example: anyway, i'm not picking at you. no idea if that was intentional, but aesthetically, i think it's better your way. Link to comment Share on other sites More sharing options...
SupraKarma Posted May 22, 2018 Share Posted May 22, 2018 17 minutes ago, fukc said: absolutely! with 'cleanup' i mostly meant how the edges of the 3 images fit together. i see how you got this all to work now. always super interesting to see other techniques in practice. would have never crossed my mind to attempt this sans masking. totally adds to the charm. i'd have over complicated that with worse results. I know what you mean... I haven't been using photoshop long, and when I open up someone else's template for something I learn something new more often than not. As for the curved lid... honestly I don't think I was paying too close attention to the details, I just hated the way perfectly 90 degree angles looked, and I wanted to add slight curvature in some way. I warped the bottom and added the curved top, but I didn't actually study any photos to see if I got it right. :) Are you saying it's accurate the way we did it? Not sure I followed your last post. The 3D SNES box project was kinda quick and dirty. My main focus was historical accuracy (actual scans and photos, minimal touchup, the colors aren't way too vibrant, the blacks aren't jet black, the whites aren't bright white, the boxes aren't cleaner than they would be brand new), and authenticity. The other set on the HS forum looks cleaner but I didn't like the generic 'SNES' sides, and they just look 'too clean.' I like the grittiness. However that said, if I cared a bit more I probably would go back through and touch up a bit. It's far from a perfect set. It suits my needs - authentic, and historically accurate. 1 Link to comment Share on other sites More sharing options...

Recommended Posts
Create an account or sign in to comment
You need to be a member in order to leave a comment
Create an account
Sign up for a new account in our community. It's easy!
Register a new accountSign in
Already have an account? Sign in here.
Sign In Now